Archive for January, 2012

h1

Where to Find Me: Harvest Noon Café

January 28, 2012

Have you ever seen food on this blog and thought, “Maaan, I’d really like to pay someone a minimal amount of money to eat that”? Well now here’s your chance.

For the last six months, I’ve been hard at work with an awesome group of dedicated students and volunteers helping to open a new campus café and restaurant we’re calling Harvest Noon and guess what—we’re opening Monday! Starting January 30th, you’ll be able to visit us on the second floor of 16 Bancroft Avenue (the Graduate Students’ Union building, in the southwestern quadrant of the UofT campus) from 10am to 2pm Monday through Friday and grab an affordable and delicious UWEA-approved lunch, along with some coffee, tea, and a muffin.

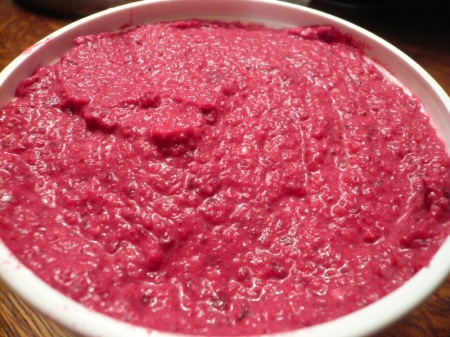
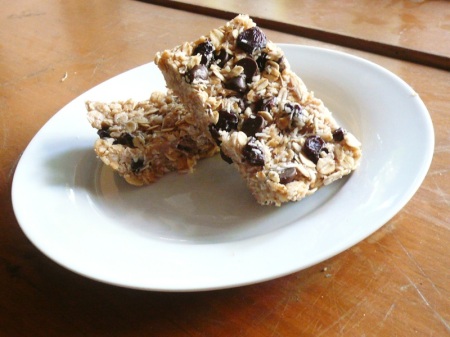
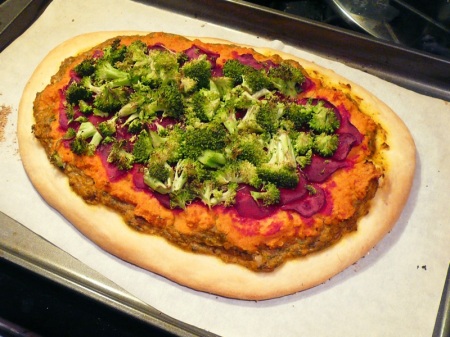
This café has been an exhilarating experience for me. I’ve been primarily involved with the menu planning side of things, and can personally attest to the awesomeness of all our food. In fact, frequent UWEA readers will recognize many of our opening week’s menu items as some of the all-star recipes from this blog, such as…

Sunchoke Soup

Hearty Apple Muffins

…and of course, my Foc Yeah! Focaccia Bread!

But Harvest Noon is more than just a super awesome restaurant which has given me the opportunity to share my food with the rest of the city. What really sets our café apart from the rest (and what got me involved in and excited about it in the first place) is our mission, mandate, and values: namely, our commitment to serving food that is locally, sustainably, and organically grown; maximally economically and dietarily accessible (that means cheap and vegan!); and of course, healthy and delicious!

Beyond all this, I just think Harvest Noon is an awesome space to be in—we’ve been slowly decorating, furnishing, and repainting for the last several months, and I love the current atmosphere and feel of the space. You’ll really have to stop by to experience it for yourself if you’re curious, but for now I’ll leave you with some more photos. Here’s one of our volunteers at our cash register:

And here are some of our other volunteers hard at work in our main space:

Oh and here’s me!

(I was kneading bread.)

So if you’re near the UofT campus next week, please stop by, say hi, and pick up some food! To repeat: 16 Bancroft Avenue, second floor, 10am to 2pm, Monday through Friday. And just in case you’re interested, let me remind you that Harvest Noon is currently opening 100% volunteer-run, and if you’re available and at all interested in helping us out, let us know by sending an email to volunteers@harvestnoon.com, and we’ll help find you a volunteer shift that works in your schedule!

(And to all my other readers: please bear with me as blog updates will be a little less frequent than usual for the next couple weeks.)

Until we eat again,

Willie

h1

Cinnamon Roasted Sunchokes (Jerusalem Artichokes)

January 14, 2012

Okay, I know. I know I know I know. This blog has a sunchoke problem.

But you see, sunchokes are just so good. And with only so many weeks left in their season, I can’t resist buying them each week at the farmers’ market and then coming home and challenging myself to find new ways to prepare them. This past week I got a little inspiration from the farmhand who sold me my sunchokes, who recommended I try roasting them with just a little bit of cinnamon. I hadn’t tried roasting sunchokes at all yet, so it seemed like a good thing to try. And boy howdy, did these taste good.

The recipe couldn’t be simpler: First, wash your sunchokes and then slice into big bite-size chunks. Next melt some coconut oil and then toss your sunchokes in that oil mixed with a teaspoon or two of cinnamon. Sprinkle a wee bit of salt on top of that, and then bake your sunchokes in the oven for about 45 minutes at 375°F, checking along the way for doneness. After they’re fork-tender, simply take out of the oven and enjoy!

And that’s all there is to it! This is probably the easiest sunchoke recipe I’ve posted thus far, yet it’s one of the best, so I hope you find time to try it our for yourself. And rest assured, there will be more sunchoke recipes to follow—the season’s not quite over yet!

Until we eat again,

Willie

h1

Toronto Café Tour: Thor Espresso Bar

January 8, 2012

Ever heard of Thor Espresso Bar? Well they were my latest stop on my Toronto Café Tour, and here’s what I have to say about them…

image

Latte: Thor’s soy latte runs an expensive $4.53, and for that price I was expecting something a little better. That’s not to say this latte wasn’t good—it was—but at the same time, it wasn’t a latte I’d come back for. I was talking to the barista for a bit and he remarked on the difficulty of getting soy (as opposed to, say, almond milk) lattes to come out right, and maybe that’s true, but I’ve definitely tasted better soy lattes in this city than Thor’s.

Atmosphere: This is no sit-down-do-work cafe. There are 9 seats in total, 3 of which are stools, and no tables whatsoever, unless you count the single bar. Granted, Thor is obviously not going for the sit-down aesthetic, aiming rather at something different; it’s just that that’s not the sort of café I generally am looking for.

One nice part about Thor’s atmosphere, however, was the artwork. When you walk in you’re greeted by this wonderful mural by local artist Afo Grigoriev:

And the same artist made this fun illustration on the washroom door:

image

Music: It started off with techno, and moved on to R&B (and not even The Weeknd, pfft). Definitely not my bag.

Clientele: Most Thor customers were either coming in to grab a quick drink, or coming in to meet and chat with a friend. No one else was as foolish as I was to bring work in with them—again, the space really isn’t made for that.

Food: Thor brings in some outside snacks and sweet treats, none of which are vegan.

Final Verdict: With expensive drinks, crappy music, and a space not made for working, I don’t imagine that I’ll be coming back to Thor anytime soon—which is not to say it’s a bad café, but just not what I’m looking for.

Until we eat again,

Willie

h1

Sunchoke (Jerusalem Artichoke) Risotto

January 5, 2012

Who’s in the mood for a brand new risotto recipe?!

Apologies to anyone hoping to gawk at some attractive food photos today: risotto’s never pretty, and these were ugly photos to boot. The good news is that the dish itself is delicious, despite appearances.

So what is it? None other than Sunchoke Risotto, an original recipe I came up with the other night in my continuing efforts to discover as many different ways to enjoy sunchokes while they’re still in season. I’ve already raved about my Sunchoke Soup and Sunchoke Hummus, and I also made a Cream of Sunchoke Pasta not too long ago (although I still haven’t gotten around to blogging that). Using sunchokes in a risotto was an idea I got from my mother, and I was excited to try it out, especially since it’s been a while since I’ve made a risotto.

My basic plan was simply to follow this fantastic Broccoli Risotto recipe from VeganDad (which I once called here “the best vegan risotto I’ve ever tasted”), subbing in sunchokes for the broccoli. More specifically, I boiled some sunchokes for a while to create a sunchoke broth, then used that broth to cook the arborio rice, adding in the cooked sunchokes at the end. Although this was a slightly long process (about an hour and a half from start to finish), it was very easy and straightforward to execute, and came out tasting awesome, as anticipated.

Sunchoke Risotto
(makes about 6 large servings)

Ingredients

  • about 2 cups sunchokes, left unpeeled and diced into small bite-sized pieces
  • 1 onion, thinly sliced
  • about 8 cups water or light vegetable broth
  • 1 glove garlic, finely chopped
  • 2 cups arborio rice
  • 1/2 cup white wine
  • 1/4 cup nutritional yeast
  • oil, 3 tbsp vegan butter, salt, sugar, pepper, and thyme

Instructions

  1. Start by cooking your sunchokes and making a sunchoke broth (a process very similar to the one I use in making Sunchoke Soup). Heat some oil in a large pot and add half of the sliced onion. After a few minutes, add in the diced sunchoke pieces and a few generous pinches of salt and sugar. Stir around and let cook for several minutes, until lightly caramelized. Then add about 8 cups water (or light vegetable broth, if you have it), bring to a boil, and then simmer for 10 to 20 minutes, until the sunchokes are soft.
  2. Strain your broth, saving the sunchokes and onions in a colander, and collecting the broth in another pot or bowl below. You don’t want anything to go down the sink here; you just want to separate about the solids from the liquid. Now you’re ready to start the risotto!
  3. In the same pot in which you cooked the sunchokes (which should now be empty), heat 1 tbsp of oil and 1 tbsp of vegan butter. Add the other half of the sliced onion and the chopped garlic and cook for a few minutes until soft but not brown.
  4. Add rice and stir around for a few minutes, until it starts to look translucent. Add some salt and pepper (don’t worry too much about amounts; you can add in some more at the end to taste) and then 1/2 cup of your sunchoke broth, stirring around constantly, until it’s absorbed, adjusting the heat as necessary.
  5. Add the 1/2 cup of wine and do the same thing: stir around constantly, until it’s absorbed.
  6. From here on out, all you have to do is use up the rest of your broth, adding it in 1/2 cup increments and stirring everything around until it’s absorbed. You should’ve ended up with between 6 and 7 cups of sunchoke broth from before. Once you get near the end of your broth, start testing the rice for doneness. I found that I only needed 6 cups of broth for the rice to be done. If you need more and have run out of broth, just use some water.
  7. When you add in your last 1/2 cup of broth, add in the cooked sunchokes and onions as well. Mix everything together, remove from heat, and then stir in the 1/4 cup nutritional yeast and 2 tbsp of vegan butter. Season with salt, pepper, and thyme to taste and serve.

Enjoy!

Until we eat again,

Willie

h1

Sweet Potato Curry Hummus

January 2, 2012

Happy New Year, folks!

Sorry I’ve been absent from the blog lately; the end of 2011 was keeping me plenty busy, and I just couldn’t find the time to blog! I’m ready to get back on track now, though, and to celebrate my return—and the new year—I’m here today to share a quick new hummus recipe I came up with this weekend: Sweet Potato Curry Hummus!

I got the idea for this hummus from the success I had with Oh She Glows’s excellent Spicy Curry Butternut Squash Hummus. Wanting to do something similar but a little different and yet still seasonal, I thought sweet potato would make an interesting substitute for the squash, especially if I replaced the tahini with peanut butter. The result was fantastic, although a little thicker than my hummuses usually turn out (and this despite all the water I added!). Anyway, this still turned out delicious. I hope you enjoy it too! (And if you are going to make it, don’t forget to check out my general tips on how to make hummus, if you haven’t read them already.)

Sweet Potato Curry Hummus
(makes about 3 cups)

Ingredients

  • 2 cups chickpeas, cooked
  • 1 medium sweet potato (should end up with 3/4 to 1 cup after it’s roasted)
  • 2 to 3 cloves garlic, chopped
  • 3 tbsp peanut butter
  • 3 tbsp lemon juice
  • approximately 10 tbsp reserved chickpea liquid, or water
  • 1 tsp salt
  • 2 tsp curry powder

Instructions

  1. Start by roasting your potato. Preheat your oven to 400°F or so, and then either: (a) peel and dice your yam, toss in a little bit of oil, salt, and pepper, and then spread out on a parchment paper-lined baking sheet; or (b) leave your yam unpeeled, poke a few times with a fork, and put it on your baking sheet whole. Bake until the flesh is very soft (at least 30 minutes, possibly more), then remove from oven. If using the unpeeled method, wait for the sweet potato to cool, and then scoop out the flesh, discarding the peel.
  2. Now simply whip everything together in a food processor, adding reserved chickpea liquid/water a little at a time until you reach your desired consistency.
  3. Garnish with crushed peanuts and cayenne powder if you’re being fancy, or not if you’re being lazy.

Mmmm. Can’t think of a yummier way to ring in the new year.

Until we eat again,

Willie